Making and How to Make Model Frozen Fountains
Christmas Village Displays
A frozen fountain provides a very magical centrepiece for any Christmas village plaza or collection of shops. And whilst it may seem like a tricky business to make one yourself and create your very own illusion of an icy fountain, frozen in time, all that is really necessary is a little in the way of time and patience, and of course, a definite element of trial and error.
The first thing to decide is how big your chosen icy water feature should be. Not too small that it doesn't stand out, but not too big that it rather dwarfs the surrounding houses, people and trees. Next, collect a number of jam jar lids and plastic screw tops to form the structure, with the largest one being used to make the bottom layer, stepping up several layers to create the desired effect.
Face the first lid downwards and on the top of this, glue a second, smaller lid facing upwards - this will create the pool beneath the fountain. In the centre of this 'pool', place a smaller lid (faced down) to provide a solid base for the actual fountain column itself and on this, glue in place a taller, narrow screw bottle top, such as the kind from cosmetics, mouthwash or shampoo. One that is textured is ideal, as this will look like a carved stone pillar once painted.
Making Your Model Fountain
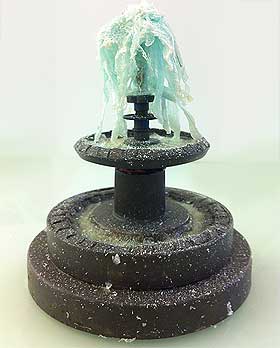
At the very top, glue in place a smaller jam jar lid or similar, to create the second pool of the fountain, and on top of this, pieces of Lego (spaceship feet) are perfect for the actual water jet itself. However, a thin bottle top would also work (such as the tall top from a small bottle of nail varnish), as would a short length of pencil or dowelling. Whatever you choose, you will first need to drill a small hole in the very centre of the top piece. Once everything is glued, it will take a while to set, since these are non-porous surfaces, so it is best to leave the model fountain in a warm place for at least a day.
When the structure is firmly bonded together, your Christmas village fountain is ready for the next steps. Roll two thin sausage-shaped lengths of modelling clay and place these inside both of the lids used to create the pools. Use the clay to shape a wall around the pool edges and then with a cocktail stick / toothpick or similar sharp object, carefully carve out a paved effect. Leave the clay to dry for a few hours and then give everything a good coat of PVA glue, to provide a surface on which you will be able to paint and add another element of overall bonding.
Painting the Fountain
When the PVA is fully dry, you can apply your first coat of grey paint. A second coat will most likely be necessary and at this stage, you can vary the shading of your paint slightly, adding in small amounts of brown and green to create an ageing effect. The actual frozen fountain jet itself is the easiest element of the whole model. Cut at least five or six pieces of thin fuse wire at lengths of two or three inches and twist the first inch or so together tightly.
Spread the top pieces of wire apart to form a fanned umbrella shape and then arch these over, angling them downwards. Poke the base of the wire into the hole drilled in the very top of the last piece of the fountain, glueing in place.
How to Make the Icy Spray
Cut some very thin strips of plastic food wrap (cling film) and scrunch these up lengthways, before glueing to the wire. This is a fiddly job and should not be rushed.
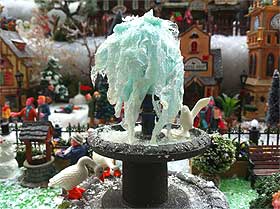
Once in place, tear a few tiny pieces of plastic food wrap and add these to the top of the icy spray. Fill the two pools up with PVA glue (this will dry clear) and pour a small amount into a dish. Leave this to stand in a warm spot for up to 30 minutes, so that it starts to set and thicken up.
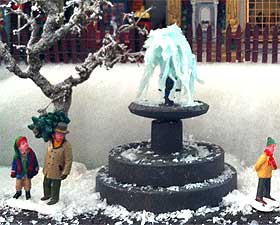
Then, carefully paint and dribble this thick glue over the fountain to create the illusion of icy water and droplets. Leave to dry and repeat this several times, to build up the layers and make a stronger, surprisingly rigid structure over the plastic food wrap. You could also use a clear nail varnish or silicone sealant.
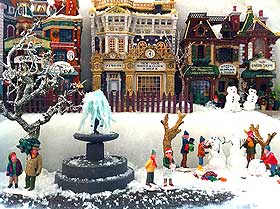
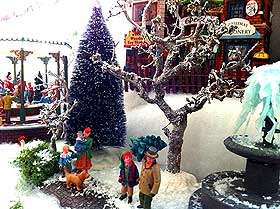
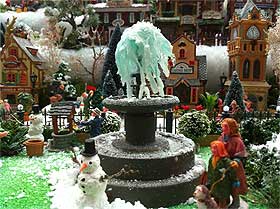
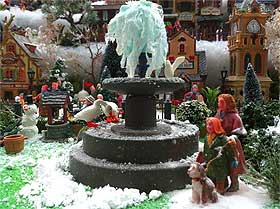
The final touch is a sprinkling of fake snow and some figurines positioned nearby, along with a few benches and perhaps the odd snowman or two.
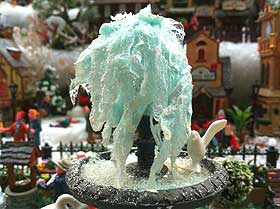
Photo of the model fountain standing in a miniature park setting, with the addition of a snowman, figurines, model geese and a small white dove:
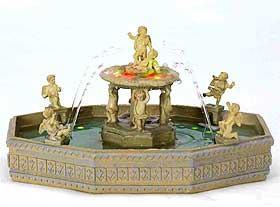
Picture of a Lemax 'Village Square Fountain', with moving water and lights powered by an AC adaptor: