Building Display Stands
Christmas Village Displays
Although a small group of houses situated on a shelf, corner stand or coffee table can look extremely charming and festive, the most impressive of Christmas villages are usually fairly large in size, requiring a good deal of preparation and planning beforehand, and lots of different individual pieces.
The layout shown in this step by step series of photographs incorporates many of the most commonly used elements, such as various different mountain platforms, porcelain houses (mainly Lemax), animated accessories and an assortment of model trees. Much thought to landscaping and scale has ensured an element of realism and Christmas magic.
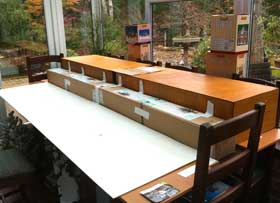
Located at the back of the table stand and providing a lengthy 2.5-metre shelf, large wooden boxes have been positioned to create the tallest level, followed by a line of short boxes for the narrowest, facade buildings.
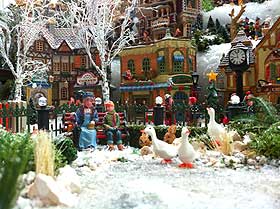
The largest grouping of houses will be positioned in an arc towards the front of the arrangement, around the plaza and its small park, which will become an important focal point where many of the smallest model figures, plants and animals can be displayed.
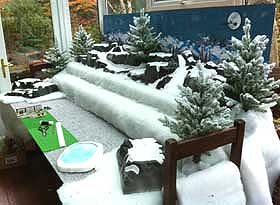
Once the tiering and platforms were all in place, everything was covered in sheets of polyester snow fabric. This was stapled into position where necessary, to ensure that it provided a firm and secure base. 'Large' artificial Christmas trees were added either side at the edges, to help frame the scene.
The table forming the base for the Christmas village display stand, with tiering added and secured with duct tape:
At the back and the sides, 'My Village' mountains were used to provide a natural, weathered appearance and a further element of height. These were then softened with green scatter, cork scatter and snow spray, so that the initial stark plastic appearance vanished. The advantage with using these particular mountains as bases for your stand is that they come with holes for electrical wires, so that the lights can be positioned both easily and discreetly.
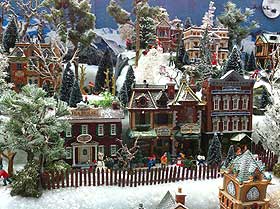
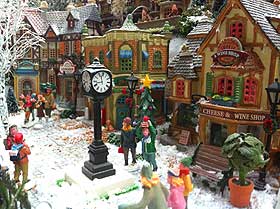
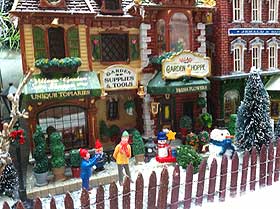
Photos of the table stand with snow fabric and mountains added, followed by 30 Lemax porcelain houses and buildings:
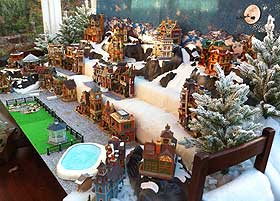
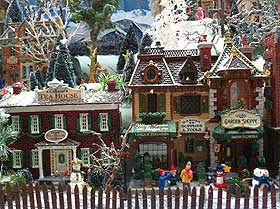
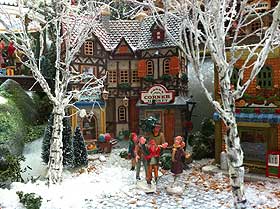
After all of the bases, plazas, streets, pathways and ponds have been positioned, the Porcelain houses and buildings were added to the Christmas village display. When positioning your buildings, do take time to arrange them and possibly rearrange them, to get the best overall effect. Larger houses at the front and smaller houses at the back is a good idea if you are trying to create the illusion of depth and distance. Any animated pieces should be spread around and not hidden, to provide movement all over the village, rather than being bunched up in just one place.
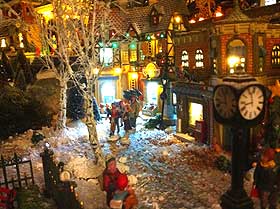
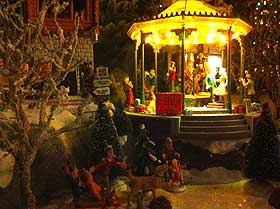
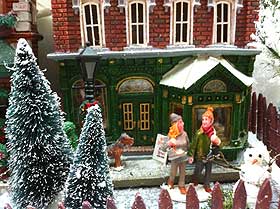
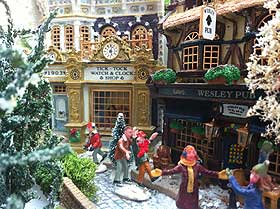
View of the display stand with around 150 trees added, followed by roughly 100 figurines:
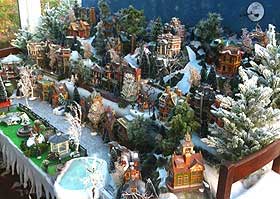
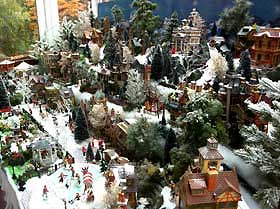
When the houses were in place, the trees were added to the Christmas village, as a mixture of single specimen trees and groups. A combination of different sizes and shapes, deciduous and evergreen trees, creates the most natural impression when viewed from a distance. Finally, the figurines, animals, snowmen, plants, flowers, green reindeer moss and other finishing touches were added. Anything that was a little unstable was stuck in place using a small amount of stick glue or an adhesive pad.
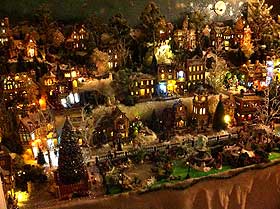
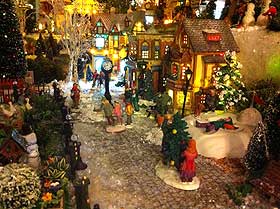
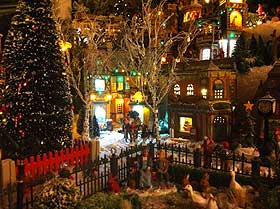
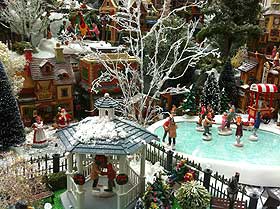
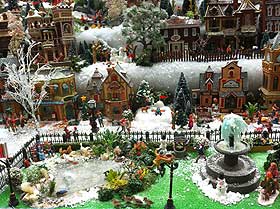
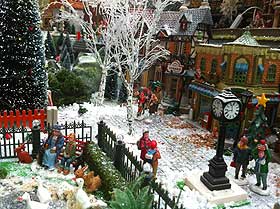
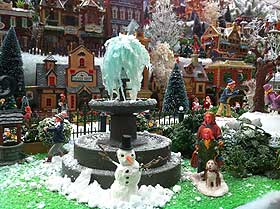
The finished Christmas village display, complete with park in the foreground:

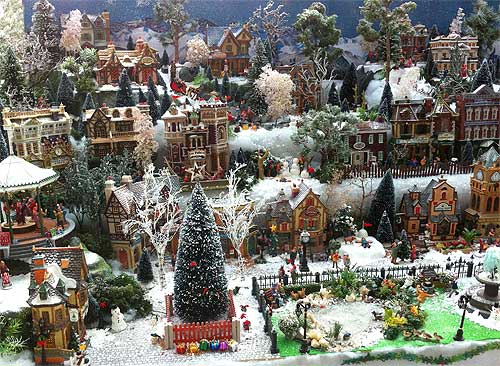
It is a sensible idea to leave spaces in between some of the houses, rather than making long rows. Try grouping the buildings in twos, threes or fives for the best effect. Deciduous trees are ideal for placing in front of houses, as they soften the structure without obscuring too much of the detail.
It can be effective to display the best trees and pieces on their own within the Christmas village setting, as specimens, while any items that are not so special can instead become part of a group, helping to hide any imperfections. The houses on each side of the display were curved inwards slightly, to make the village appear more 'welcoming' when viewed from the front.
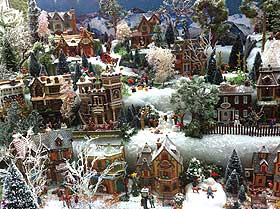
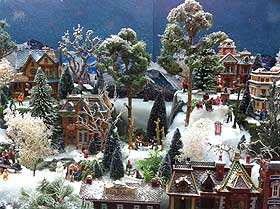
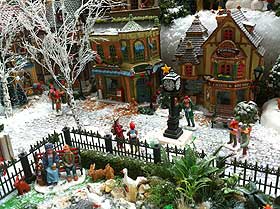
Daytime views of the completed Christmas village display stand:
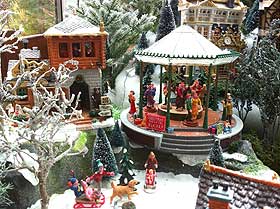
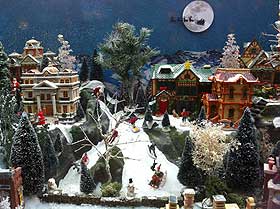


Night-time views of the completed Christmas village display stand: